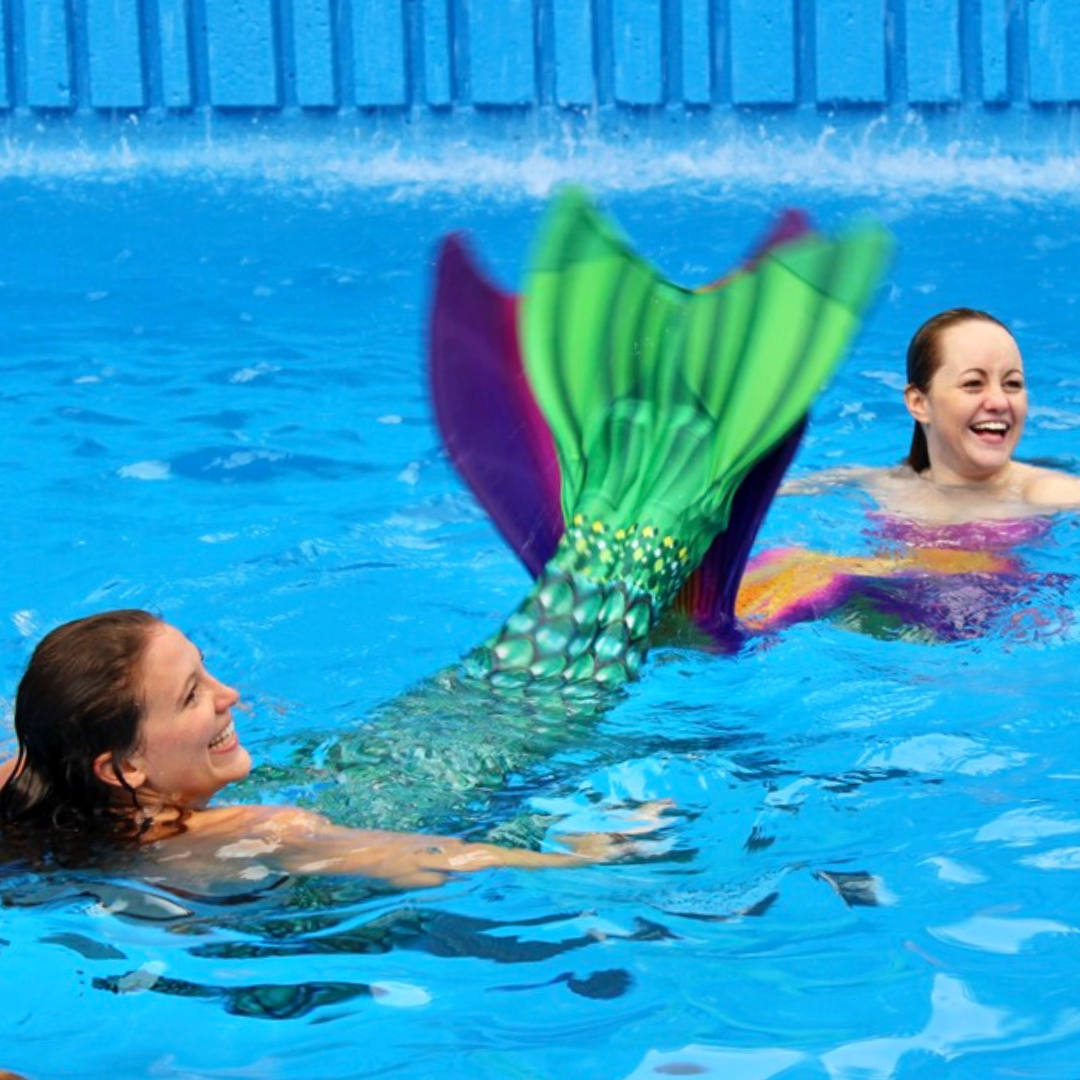
If you think being a mermaid is all fun and games and floating around looking pretty, you’re wrong! Mermaid swimming is a sport, a career, an art form, a hobby, and an exercise. Being a mermaid requires training and practice. There are many important swim skills to learn in order to swim like a mermaid efficiently and gracefully.

1. What are the Basic Mermaid Swimming Skills?
It goes without saying that to be a mermaid you need to know how to swim. If you aren’t a strong swimmer, swimming in a mermaid tail could be unsafe. The dolphin kick, the swim stroke used while swimming in a tail, is an advanced swimming skill that is usually not introduced until later on in swim lessons.
These are some basic swim skills that you should be able to do to swim like a mermaid. Practice these moves before putting on a tail:
Dolphin kick - This is the body motion mermaids use when they swim. It is a swim stroke where you kick with your feet together, instead of each leg doing a separate kick. It is a full body wave motion that requires flexibility and strong legs and core muscles. Keeping your legs together, you propel yourself by pushing the water up and down with your feet. Your whole body should move in a fluid motion.
A good trick to master this move is to start a body roll with your head, shoulders, chest, and hips, with slight movement of the knees and a whipping motion of pointed ankles. Make sure to not kick from your knees. The main power of that movement comes from your hips and core muscles. You can let your arms follow your motion along the side of your body.

Front float - To go from treading water to being on your stomach you need to lower your head, putting your face all the way in the water, then look down at the bottom. If you do this while staying still, your legs will float up to the surface and you will be doing a front float.

Back float - When you can no longer hold your breath, coming to the surface and doing a back float is what you can do to get more air. While on your back you need to tilt your head back, so the back of it is submerged. Your forehead should be slightly submerged, but your face will be out of the water and looking up at the ceiling or sky. Once again, you need to be relaxed; if you thrash about then you will become unstable and start to sink. Keep your body long and your stomach up. *When you take a deep breath, your lungs will fill with air and become inflated, like a balloon, which will help you to stay afloat.

Rollover - This is the move used to roll from a front float to a back float, or vice versa. It is also a useful move for doing elegant underwater twirls. While floating on your back or stomach, turn your head to one side and angle your shoulders toward the direction you are rolling to. Engage your core for a faster rollover. When you start to turn into the water with your eyes, the rest of your body naturally will follow. *Rule of thumb: Wherever your head is looking or leaning your body will follow.
Streamline -This position is how mermaids hold their arms while they do the dolphin kick. You place your arms straight up beside your head. Squeeze your ears with your forearms and have your hands together, extended. *This position offers the least resistance in the water, which makes it perfect for having speed and efficiency while swimming.

2. How do you control your buoyancy?
Buoyancy is the ability to float, and as mermaids it is important to master control over it. This means more than just floating on top of the water. Proper buoyancy control means you can sink to the bottom and are also able to stay neutrally buoyant. Being neutrally buoyant is when your density is equal to the water’s density and you can be submerged in the water without sinking or floating back to the surface.
First thing to understand is that your lungs are like balloons. When they are filled with air they are expanded. Just like a blown-up balloon will rise to the top after being submerged, so will your body if you are holding too much air. When you release the air, it will allow you to begin sinking, so you just have to master letting out the right amount of air.
Neutral buoyancy
To achieve neutral buoyancy you want to exhale, blowing bubbles to allow yourself to sink slightly. You don’t want to let out all of your air, just enough to make yourself float without rising or sinking.
This takes some practice and trial and error to figure out the right amount of air to release from your lungs. *Important: your mermaid tail or swimsuit material can affect your buoyancy. For example, neoprene fabric floats. Neoprene fabric captures mini air bubbles that keep you warm but also make you float.
Sinking
Just like with neutral buoyancy you want to let out your air, this time it will be more. Slowly begin to let out your air by blowing bubbles. You will be letting out most of the air stored in your lungs. You can also use your hands to push the water upward, which will help you to go down.
There are some things that will affect your ability to sink. Loose-fitting wetsuits add resistance, so make sure to wear a tight-fitting wetsuit, bathing suit, or mermaid tail.
Wearing a weight belt can also help you to sink and to stay lower. This is important if you are a professional mermaid swimming in a tank. You need to be able to sink low enough that people can see you well without having to look up.
Some people may have difficulty sinking if they have a higher percentage of body fat. Fat is less dense than water, so it will make you float. Muscle is much more dense than fat that makes you sink. Women naturally have a higher fat percentage than men in their body.
Pro tip: If you are planning to do a long breath-hold and dive deep you don’t want to blow bubbles and lose precious air to control your buoyancy. You can take a full breath and quickly dive. If you dive, the air in your suit and lungs is compressed and your buoyancy decreases. You will need to use your muscles to swim down against the buoyancy of the air in your lungs. For novices, it seems neutral buoyancy is achieved at about ten meters deep. When you are neutral at ten, you will be negative (you will sink) at any deeper depth and positive at any shallower one.
3. How do you swim deeper?
To swim deeper you will have to employ the same tips for sinking. There are some other things to learn in order to master swimming deeper.
Equalizing your ears
Pressure changes as you swim deeper, and you can feel that pressure in your ears, similar to when you are in an airplane or are driving up a mountain. For this reason, it is very important to equalize your ears as you descend to avoid the pain that pressure will cause.
How to equalize:
You need to hold your nose and blow gently out of it, and you’ll feel a change in pressure along with some little crackling sensations. If you blow too hard you will damage your eardrums. You can also move your jaw back and forth to equalize your ears.
A good practice is to swim down diagonally as you descend deeper, to make the pressure change more gradual.
Holding breath
When you dive down deeper, you’ll be holding your breath for a longer time, so it is important to practice your breath-hold.
When we breathe normally we only use about 20% of our lung capacity. But we can train ourselves to breathe in more air, use more of the space in our lungs, and resist the urge to take a new breath right away.
First things first, always have someone with you. If you push yourself past your limit while holding your breath you could pass out.
When practicing holding your breath, you need to make sure you are relaxed. Always stretch before beginning to practice; loosening your muscles can help you to stay relaxed. Tense muscles will use up oxygen. You want to focus your stretches around the thoracic cage that protects your lungs.
Take long, slow, deep breaths. Breathe in through the nose for at least two seconds, then stop inhaling and just hold the air for a few more seconds. The pause can help to slow your heart rate. Then slowly exhale, letting all the air out. Repeat this exercise for two minutes.
Once relaxed you can begin to try holding your air for longer. You always want to be doing a belly-breath, meaning you use your diaphragm when you take your deep breaths. Your stomach should be moving as you take your breaths. Your shoulders should not be rising and lowering, nor should your ribs be expanding. You want to use your lower lungs for proper breath-holding. Your stomach should extend as you inhale, as the lungs fill with air, and it should contract as you exhale. This is called a breathe-up session. You can do them on land to prepare your body for breath-holds in the water. There are CO2 and O2 tables that can guide you through progressive breathing exercises to slowly increase your breath-hold capacity.
Another thing to remember is that when you are holding your breath, always make sure you keep your air contained at the epiglottis, rather than holding it all in your cheeks. The epiglottis is a flap of cartilage in your throat. Its function is to switch between covering the airway and the esophageal tube. If you swallow you can feel your air being held in your throat.
4. How can you swim a full lap underwater?
If you strive to swim a full lap across the pool in one breath but can’t quite make it all the way, then there are some changes you need to make. A dynamic swim uses more energy, so you need to prepare by taking deep breaths. You want to be relaxed when you do the lap. Inhale for two seconds, exhale for four seconds. Do this for two minutes. Then take one big inhale before going underwater.
With a long, extended body, fly through the water with powerful pushes and let yourself glide for a few seconds after each push to conserve some energy. You want to minimize the number of strokes you make, so each one needs to be powerful and efficient. That way you will use the least amount of oxygen possible for moving. Keep your body horizontal. Stay close to the surface and don’t use your energy to go down deep.
It is not true that the faster you can swim, the higher your chances of making it the whole way across. It’s better to keep a steady pace for the full lap, rather than rushing at the end when you are almost out of breath. This is a mental fight you need to have with your body to keep your mind at peace and to relax. Tell yourself it is ok, and that you can make it. As a reference, your breath-hold while swimming will be half of the time compared to your static breath-hold.
5. How can you swim faster?
We all strive to do things better and faster. This goes for swimming. “Flipping your fins you don’t get too far” is simply not true, especially if you follow these tips.
Here are some secrets for increasing your speed in a mermaid tail
Hold your arms in a streamline position. This means your biceps are beside your head, you’re your arms nice and straight above your head, and you have a long, extended body, and pointed toes.
-
Stay in a horizontal position to create less resistance.
-
Going back up for air will slow you down, so take several slow breaths beforehand and then one huge breath before you go under. Fill your lungs and your stomach with air. Be mentally strong when you get the urge to go back up.
-
Reduce amplitude of movement, so use small fast kicks for less resistance.
-
The power of the motion should come from the core, so hold your stomach muscles tight, and be sure not to kick with knees, which is not efficient.
-
Push the same amount of water up and down for your dolphin kicks. The force applied to your strokes should be equal.
-
Having less resistance can help you swim faster. Avoid wearing anything loose or baggy.
-
Use weights to stay neutrally buoyant, so you won’t be fighting to stay underwater.
-
Using a large monofin can help you swim faster because it pushes more water when you kick, increasing propulsion. Monofins that help you swim faster are stiffer and are used for freediving.
6. How do you open your eyes underwater?
Some people will find it easy to open their eyes underwater, while others may struggle. It’s a good skill to develop because if you want to take mermaid pictures underwater it looks best if you aren’t wearing goggles and can have your eyes open. This is also true if you are a professional mermaid in a tank or aquarium.
If you are just practicing swimming, then goggles are a good idea. But for events or a mermaid job, you’ll need to get comfortable opening your eyes underwater.
Opening your eyes underwater can be painful, as water rushes into them and disturbs the eye’s natural tear membrane, especially if there’s chlorine or salt.
Here are some tips for avoiding that pain:
-
Avoid chlorinated water. The chlorinated water in pools and hot tubs tends to hurt more than ordinary water when it gets in your eyes. While it's great for killing waterborne germs, the redness, stinging, itchiness you can get after a dip in the pool can be seriously annoying. In some cases, chlorine can also dehydrate the cornea, leading to cloudy, distorted vision for a short time. While practicing opening eyes, don’t start in a heavy chlorinated pool. Ease your way into being able to open your eyes in chlorinated water.
-
Avoid salt-water. Salt naturally draws moisture out of the eyes, dehydrating them and causing a stinging sensation. In addition, the sorts of places where you're likely to swim in salt-water (like beaches) can have additional contaminants in the water like biological matter, silt, and pollution. The eyes are naturally covered with a salty fluid (you are probably aware of this if you've ever tasted your own tears). However, the average salt content of the ocean is usually about three to four times saltier, leading to the imbalance that dehydrates your eyes.
-
Remove contact lenses before swimming. The water can cause the contact to deform and press against the eye, causing pain. Contacts can also trap bacteria and microorganisms from the water against the eye, which (in rare cases) can lead to infections that cause serious vision problems. If you must wear contacts underwater, use single-use disposable contacts and discard them after you swim. This way, you won't need to carefully disinfect them
-
Have a soothing saline solution handy. Saline solutions contain a mix of salt and water that is specially formulated to match your eyes' natural salt levels. Applying a few drops after swimming without goggles is a great way to flush contaminants out of your eyes, soothe stinging, and reduce the risk of infection. You can usually find bottles of saline solution at pharmacies and grocery stores for fairly cheap. In a pinch, you can also splash your eyes with cool, clean, fresh water like you'd get from a bottle or the tap.
-
Squint, rather than opening your eyes completely. The less you expose your eyes to water, the less you'll irritate them.
7. Practicing underwater vision
-
Enter the water with your eyes closed. Clean, freshwater is best for practicing in. An example is a bathtub or clean lake.
-
Try squinting at first. Blink if squinting is too painful, you may be swimming in eye-irritating water (or may just naturally have sensitive eyes).
-
Slowly open your eyes wider. Now, gradually open your eyelids to their natural open position. It often feels unnatural, like swallowing a pill without water or looking over a high ledge if you're afraid of heights. If you're nervous, go extra-slow to reduce your anxiety. Some people find it easier to open their eyes underwater if they look upward. Try experimenting with pointing your eyes in different directions to find a position that feels best for you.
-
Close your eyes as soon as they start to sting. Your eyelids will recoat your eyes with a protective layer of tears, reducing the pain. When the stinging goes away, gradually open your eyes again. Repeat this pattern as you swim underwater to keep the pain under control.
-
If you're having trouble, test your skills in a controlled environment. Like in a bowl of water or in the bathtub.
Opening your eyes is mainly a mental barrier. Discomfort in the eyes is something that you can adjust to, or at least push through. It is a manageable pain. Remember you can always, and should, wash your eyes out with freshwater afterwards.
8. How do you deal with the pain of water in your nose?
If you’ve ever jumped into water and experienced the water rushing into your nose, you know it’s no fun to get water up there. There are several reasons why you can get pain inside your nose from swimming.
Your nasal cavity has its own unique environment with a specific temperature and salt concentration. Coldwater can be a shock to your nasal cavity, as it has a different internal temperature. Having water of a different salt concentration rush into your nose and sinuses can also cause discomfort. Luckily this can be avoided!
Take a deep breath until the point that you cannot inhale through your nose. Then when entering the water you should hum softly. You will gently be blowing air from your nose, which should prevent the water from getting in. Be careful not to let too much air out of your lungs, then you won’t be able to stay under the water for as long.

Just keep practicing!
Practice all of these tips to become a better swimmer and a better mermaid. It takes time to develop skills, so go easy on yourself. Mermaiding is supposed to be fun, so if you have some trouble at first, don’t fret; just keep practicing! Soon you will be a strong and graceful swimmer and swimming in a tail will feel as natural as walking on land.